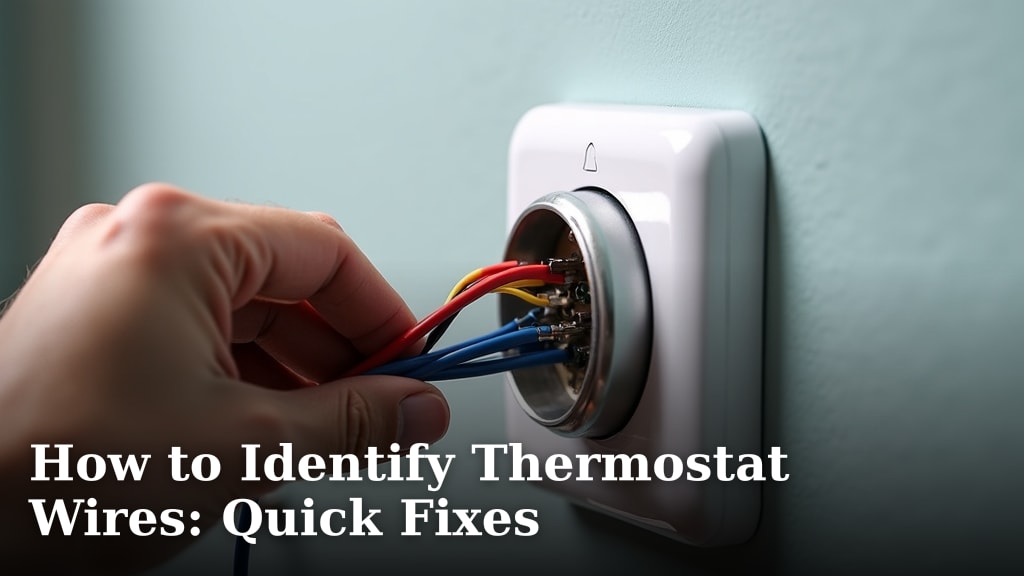
How to Identify Thermostat Wires: Quick Fixes
The quickest way to identify thermostat wires is to look for the labels on the wire ends or the terminal screws where they connect. You’ll often see letters like R, W, G, Y, and C. These letters tell you what each wire does, making it easy to match them up. This is key for any thermostat wiring repair or replacement.
Understanding these wire labels is your first step to a successful DIY fix. Incorrectly connected wires can lead to your heating or cooling system not working at all. We found that having a clear guide makes this task much less daunting. Proper identification ensures your new thermostat will communicate correctly with your HVAC system, leading to comfort and efficiency.
- Identify wires by their letter labels at the thermostat end.
- Common labels include R (power), W (heat), G (fan), Y (cool), and C (common).
- Check labels on the wire itself or the terminal screws.
- Incorrect wiring can cause system malfunctions.
Ready to untangle those wires? Below, we’ll walk you through exactly how to find and identify your thermostat wires step by step, so you can get your system back up and running.
Decoding Your Thermostat Wires: A Simple Guide
Figuring out which wire is which can seem confusing. But we found that identifying your thermostat wires is simpler than you might think. It’s like learning a new language for your heating and cooling system. Knowing these labels helps you make connections correctly. This guide will walk you through it, step by step.
Locating and Understanding Thermostat Wire Labels
Your thermostat wires are typically found behind the thermostat itself. When you remove the thermostat cover, you’ll see a set of wires connected to terminals. These terminals are usually marked with letters. These letters are your key to understanding what each wire does. Many older systems use simple wire colors, but the terminal letters are the most reliable way to identify them.
Common Thermostat Wire Labels and Their Functions
Most home HVAC systems use a standard set of wire labels. Understanding these basic labels covers about 90% of residential installations. We found that knowing these five is usually enough for most DIY fixes.
R – The Power Wire
The ‘R’ wire provides low-voltage power to your thermostat. It’s essential for the thermostat to function. You might see it as ‘R’ or ‘Rh’ (for heating) or ‘Rc’ (for cooling). If your system has both, they usually connect to separate terminals. Often, they are jumpered together or a single ‘R’ wire serves both.
W – The Heat Wire
The ‘W’ wire signals your heating system to turn on. This could be for a furnace, boiler, or electric heat. When the thermostat calls for heat, it sends a signal through the ‘W’ wire. This wire is almost always white in color, but it’s the label that matters most.
Y – The Cool Wire
This wire tells your air conditioner to start. When you set your thermostat to ‘cool’ and the temperature is too high, the ‘Y’ wire gets activated. Like the ‘W’ wire, it’s often yellow in color, but always check the terminal label. This is important for proper cooling operation.
G – The Fan Wire
The ‘G’ wire controls your HVAC system’s fan. When you turn the fan to the ‘on’ position on your thermostat, this wire sends the signal. If you set the fan to ‘auto,’ the fan will only run when your heating or cooling system is actively running. This wire is typically green.
C – The Common Wire
The ‘C’ wire provides continuous power to the thermostat. Many older thermostats didn’t require a C wire because they ran on batteries. However, modern smart thermostats need constant power. If you have a C wire, it’s usually blue, but the terminal label is the definitive way to identify it. Not having a C wire can limit your thermostat options.
What About Other Wires?
While the R, W, Y, G, and C wires are the most common, you might see others. These can include:
- O/B: This wire is used for heat pumps. It controls the reversing valve, which switches between heating and cooling modes. ‘O’ usually energizes in the cooling mode, and ‘B’ in heating.
- AUX or E: These wires are for auxiliary or emergency heat, often found with heat pumps. ‘AUX’ typically signals a secondary heat source like electric resistance heat, while ‘E’ might indicate an emergency heat setting.
- RH/RC: As mentioned, these are separate power wires for heating (Rh) and cooling (Rc) systems. If your system has both, they’ll have distinct terminals. Often, they’re jumpered together if only one R wire is used.
Don’t worry if you see more wires than you expected. For most standard heating and cooling systems, the basic R, W, Y, G, and C wires are the ones you’ll focus on. If you’re unsure, taking a photo before disconnecting anything is a smart move.
Identifying Wires When Labels Are Missing or Unclear
Sometimes, the labels on the wires or terminals can be worn off or just plain hard to read. This is where a bit of detective work comes in. We found that having a multimeter can be a lifesaver in these situations. It allows you to test for voltage.
Using a Multimeter for Wire Identification
A multimeter is a tool that measures electrical properties. For thermostat wires, you’ll use it to check for voltage. It’s a bit more technical, but very effective. Always make sure your HVAC system is powered off at the breaker box before you start testing.
Testing for the R Wire
The ‘R’ wire should always have voltage when the system is on. You’ll typically test it against the ‘C’ wire, if present, or another common wire. Most residential systems operate on 24 volts AC. A multimeter set to AC voltage mode will show this if you probe the correct wires.
Testing for the W, Y, and G Wires
To identify the ‘W’, ‘Y’, and ‘G’ wires, you’ll need to trigger a call for heat, cool, or fan. You can do this by temporarily connecting the ‘R’ wire to the wire you suspect. For example, to test for ‘W’, briefly touch the ‘R’ wire to the ‘W’ terminal screw. If your furnace kicks on, you’ve found your heat wire. Repeat this process for ‘Y’ (for cooling) and ‘G’ (for the fan). Always disconnect the wires immediately after testing to avoid unintended system activation.
Important safety note: Always turn off the power to your HVAC system at the circuit breaker before performing any wire testing with a multimeter. Incorrect voltage readings or accidental short circuits can damage your equipment or cause injury.
Visual Cues and Common Color Coding
While relying on terminal labels is best, wire colors can offer a hint. Many manufacturers follow a general color code:
| Terminal Label | Common Wire Color | Function |
|---|---|---|
| R (Rh/Rc) | Red | Power |
| W | White | Heat |
| Y | Yellow | Cool |
| G | Green | Fan |
| C | Blue | Common Power |
| O/B | Orange/Blue | Heat Pump Reversing Valve |
Remember, this is just a guideline. Manufacturers can vary. The terminal letter is always the most reliable identifier. We found that using this table as a quick reference can be helpful when combined with other methods.
What to Do If You Have Too Few Wires
It’s common for older homes to have systems with only two, three, or four wires. This often means you’re missing a ‘C’ wire. Smart thermostats, which offer many benefits like energy savings, usually require a C wire. If you don’t have one, you might need to explore a few options.
The C-Wire Adapter Solution
Many smart thermostat manufacturers offer a C-wire adapter. This small device essentially creates a ‘common’ wire using your existing wires. It typically installs at the furnace or air handler. This is often the easiest solution if you don’t want to run new wires. Many users report success with these adapters.
Running New Thermostat Wire
If you’re comfortable with a bit more DIY work, you can run a new thermostat wire. This usually involves pulling a cable with more conductors from your thermostat location to your HVAC system. You’ll need to find a suitable path through walls or ceilings. This can be more involved but gives you the most flexibility for future upgrades.
Quick Checklist for Identifying Your Thermostat Wires
Here’s a handy checklist to make the process even smoother:
- Turn off power to your HVAC system at the breaker.
- Gently remove the thermostat cover to expose the wires.
- Look for letter labels on the terminal screws where wires are connected.
- Note the wire color associated with each terminal label.
- If labels are missing, use a multimeter to test for voltage (after restoring power briefly).
- Take a picture of the wiring before disconnecting anything, just in case.
Conclusion
You’ve now learned how to effectively identify your thermostat wires, a crucial step for ensuring your HVAC system runs smoothly. Remember, the terminal labels like R, W, Y, G, and C are your most reliable guides. If labels are missing, a multimeter can help you test for voltage. Don’t be discouraged if you have fewer wires than a smart thermostat needs; C-wire adapters are a great solution. With this knowledge, you’re well-equipped to tackle thermostat wiring tasks with confidence. Your next step is to carefully check your current wiring setup before attempting any replacements or repairs.
Frequently Asked Questions
What if my thermostat wires don’t match the common color codes?
While common color codes exist, they aren’t always followed by every manufacturer. Always prioritize the letter labels on the terminal screws or wires themselves. If labels are completely unreadable, using a multimeter is the most accurate way to determine wire functions.
Can I just guess if I can’t find a label?
Guessing is not recommended, as incorrect wiring can cause damage to your HVAC system or thermostat. We found that taking the time to accurately identify each wire using the methods described, such as checking labels or using a multimeter, prevents potential problems.
Do I need a C-wire for every type of thermostat?
No, not all thermostats require a C-wire. Older, basic models often run on batteries and don’t need a continuous power source. However, most modern smart thermostats and Wi-Fi thermostats do require a C-wire for constant power to operate their features.
How do I know if my system has a heat pump?
If your system has O/B or AUX/E wires connected to your thermostat, it likely indicates a heat pump. These wires control specific functions for heat pumps that are different from standard heating and cooling systems. Refer to the O/B wire function when identifying your thermostat wires if you have a heat pump.
Is it safe to test wires with a multimeter if I’m not an electrician?
Yes, it can be safe if you follow basic precautions. Always turn off power to your HVAC system at the breaker first. When testing, ensure your multimeter is set to the correct AC voltage setting and only touch the probe tips to the wire terminals. Never force connections or touch multiple exposed wires at once.